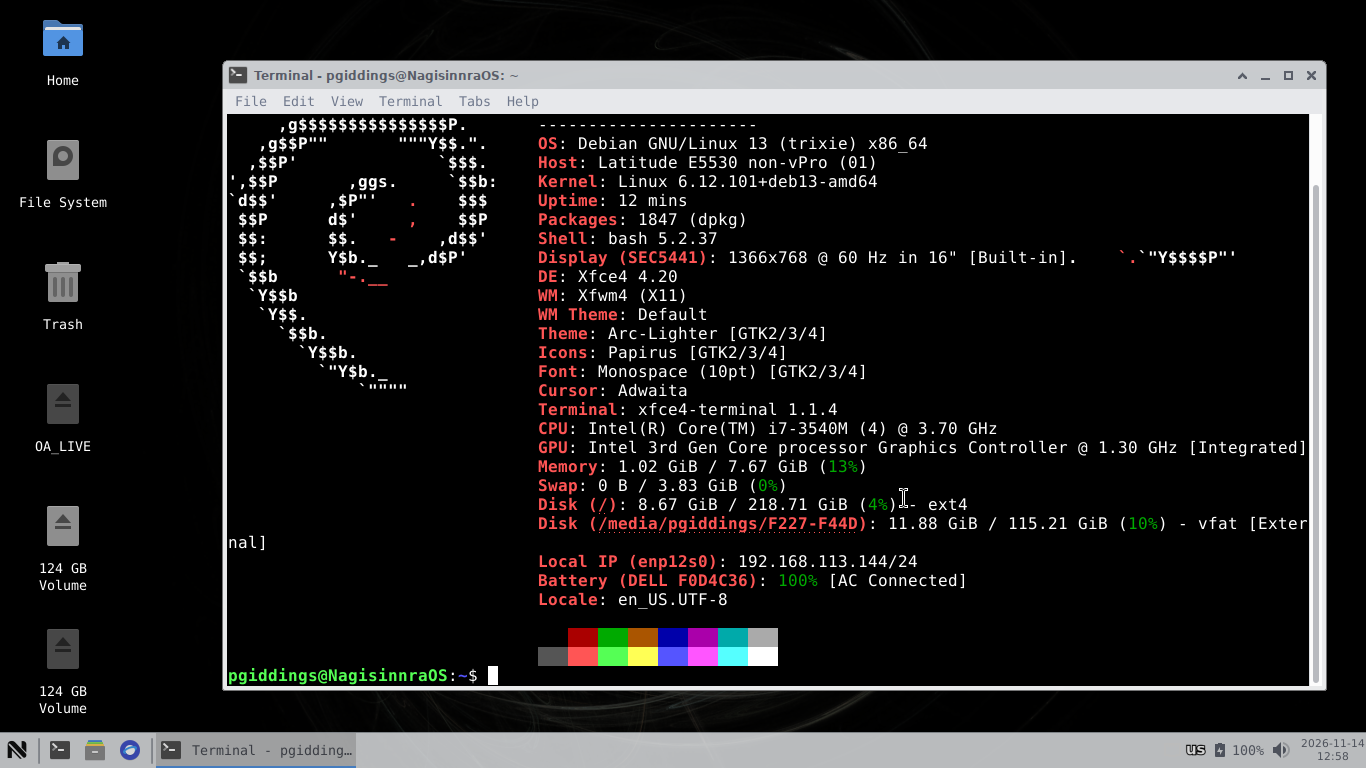
Another Day, another Distro: Installing NagisinnraLinux on a Dell Latitude E5530
Every tech enthusiast has that one old laptop they can’t quite bring themselves to throw away. Mine is a Dell Latitude E5530 — a business-class machine from around 2012, shipped with a third-generation Intel Core processor and Windows 7, which reached end of support ages ago. The hardware is fine: sturdy magnesium-alloy chassis, a good keyboard, easy access to RAM and the hard drive bay. It’s the software that made it feel ancient.
Enter NagisinnraLinux — a Japanese distribution based on Debian’s Stable branch, designed specifically to bring older hardware back to life. If you’ve been looking for a reason to dust off an old Latitude, this is a great excuse. Here’s how the installation went.
Why NagisinnraLinux?
NagisinnraLinux isn’t trying to be flashy. It’s a lightweight distro built around a simple promise: a snappy, minimal, fully functional desktop on aging machines. Its headline features read like a checklist for anyone reviving an old laptop:
- A lightweight Xfce desktop (KDE Plasma is also available), tuned to stay responsive on limited hardware
- Advanced memory optimisation with zram compression, so multitasking stays smooth even with modest RAM
- Removal of unnecessary services to maximise battery life and CPU responsiveness
- Debian Stable underneath, so it’s dependable, familiar, and uses
aptwith.debpackages - Out-of-the-box Japanese-language support (it works well in English too)
Best of all, it ships with a graphical Calamares installer, so the setup process is nearly identical to Ubuntu, Fedora, or any other mainstream distro you may have used.
What You’ll Need
- The NagisinnraLinux ISO — around 2.5 GB, downloadable from SourceForge (linked from its DistroWatch page). Version 1.1.1, released October 2026, is what I used.
- A USB stick of 4 GB or larger (everything on it will be erased)
- An Ethernet cable or working Wi-Fi for the post-installation updates
- About half an hour
Step 1: Prepare the Install Media
Flash the ISO to your USB stick with a tool like balenaEtcher, Rufus, or dd:
sudo dd if=nagisinnra-1.1.1.iso of=/dev/sdX bs=4M status=progress oflag=sync
(Replace /dev/sdX with your actual USB device — double-check with lsblk before running this, as it will overwrite the target.)
Step 2: Set Up the Laptop
Before booting, I gave the E5530 a small tune-up. My model had 8 GB of RAM and an ageing 500 GB spinning hard drive. The RAM is honestly adequate for Xfce — NagisinnraLinux’s zram compression squeezes plenty of life out of 8 GB — but if your machine still has a mechanical disk, spending a few dollars on a cheap SATA SSD is the single best upgrade you can make. Boot times drop from minutes to seconds.
To boot from USB, power on the Latitude and press F12 repeatedly to open the one-time boot menu, then select your USB drive. If Secure Boot causes trouble, you can disable it in the BIOS (F2 at boot) — though Debian-based installers with signed bootloaders generally get along with it fine.
Step 3: Try It Live
Like most modern distros, NagisinnraLinux boots to a live session first. Take a moment to poke around: check that Wi-Fi works (on the E5530 it did, thanks to the well-supported Intel wireless card in this generation), confirm the trackpad behaves, and make sure sound comes out. Everything worked out of the box on my machine — no manual driver installs needed.
Step 4: Run the Installer
Double-click the install icon on the live desktop and Calamares takes over. The flow is the familiar one:
- Language and locale — English (or Japanese, if you’d like to test the distro’s native tongue)
- Keyboard layout
- Disk partitioning — I chose “Erase disk” with ext4. Btrfs is also offered if you want snapshots-friendly filesystem features. The installer handled the dual-boot question gracefully too, if you’d rather keep a Windows partition around.
- Timezone
- User account — set your name, username, and password
- Summary and install
The install itself completed comfortably within fifteen minutes. After a reboot and removing the USB stick, I was greeted by a clean, understated Xfce desktop.
Step 5: First Boot and Tweaks
After logging in, a few housekeeping steps brought things up to date:
sudo apt update && sudo apt full-upgrade
From there, I installed my usual suspects — Firefox ESR comes preinstalled, and adding a backup tool and a couple of media codecs was one apt install away. Battery life on the E5530 was noticeably better than under Windows 7 in its day, which I attribute to the distro’s stripped-down service stack. Idle RAM usage sits comfortably low, and zram keeps things fluid even with a browser, LibreOffice, and a terminal open simultaneously.
Verdict
Is a twelve-year-old Latitude going to replace a modern ultrabook? No — but that’s not the point. For everyday tasks: browsing, writing, email, light coding, streaming — the E5530 running NagisinnraLinux feels genuinely usable again, not merely tolerated.
What impressed me most is how little friction there was. The Calamares installer, Debian base, and sensible defaults mean anyone who has ever installed a mainstream Linux distro will feel right at home, while the distro’s old-hardware focus means the machine it lands on isn’t fighting the operating system.
If you have an old Latitude, ThinkPad, or any dusty laptop in a drawer, NagisinnraLinux is one of the most painless ways I’ve found to give it a second life. The E5530 lives to compute another day.
Leave a Reply