From ISO to Dual Boot: Installing KDE Linux with MX Live USB Maker

Published: November 2, 2026 | Reading time: ~12 minutes


Introduction

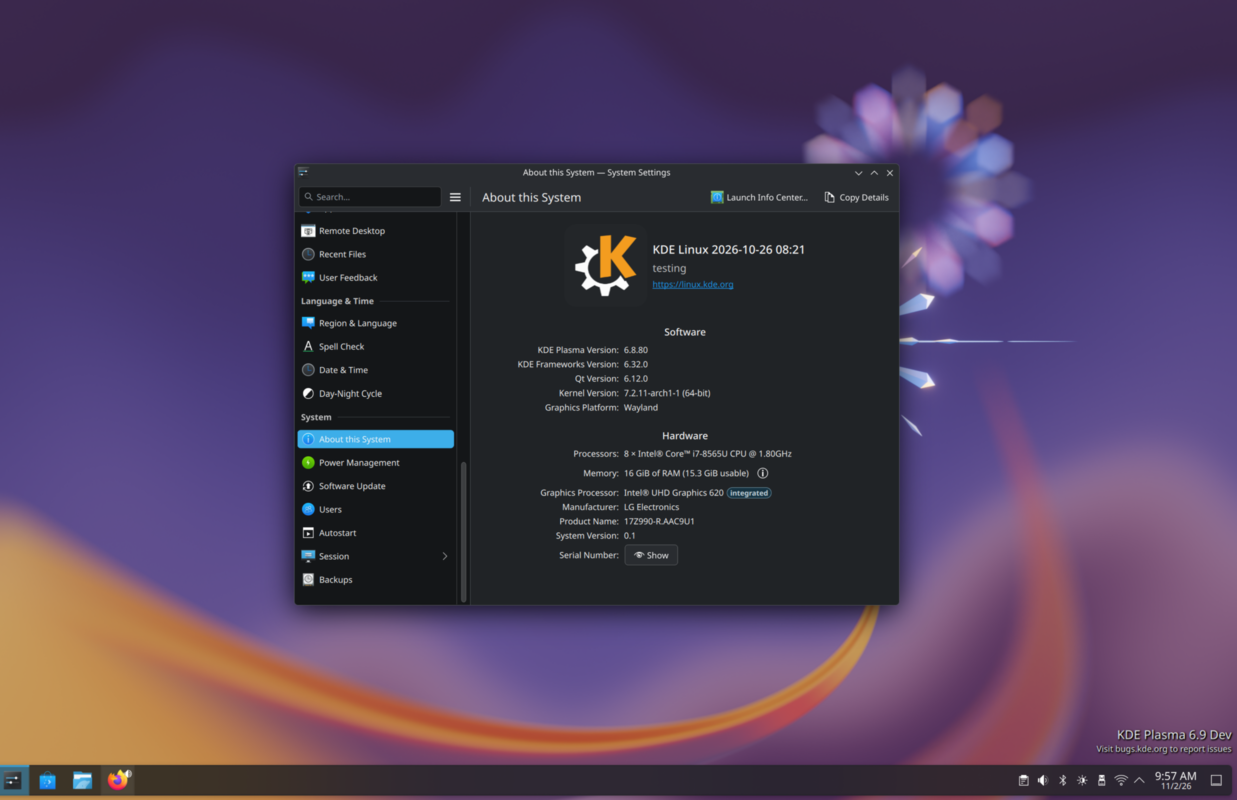
KDE Linux represents an exciting new direction in the Linux ecosystem—a purpose-built operating system from the KDE community itself. Unlike traditional distributions that bundle KDE Plasma as a desktop environment, KDE Linux is an opinionated, image-based OS designed to deliver the KDE experience in its purest form.

But here’s the catch: KDE Linux is currently in Alpha. The official stance is clear—no dual-boot support, no Secure Boot compatibility, and “complex partition setups are not yet supported.” Yet for adventurous users who want to experiment without dedicating an entire machine, dual-booting is still possible with careful preparation.

In this guide, I’ll walk you through downloading KDE Linux, creating a bootable USB with MX Live USB Maker (an excellent alternative to the official ISO Image Writer), and installing KDE Linux alongside your existing operating system.


⚠️ Critical Warnings Before You Begin

Read this section carefully. Skipping these warnings could result in data loss.

RiskSeverityMitigation
Data loss during partitioningCriticalFull backup of all important data
Bootloader corruptionHighKeep Windows/Linux recovery media handy
Alpha software instabilityMediumDon’t use as primary daily driver yet
No Secure Boot supportMediumMust disable in UEFI settings
Potential rollback issuesMediumDocument your installation state

The KDE Linux project explicitly states: “No other OS on the same device – dual-boot at your own risk!” This guide assumes you understand and accept these risks.


Part 1: Downloading KDE Linux

Step 1: Visit the Official Download Page

Navigate to https://linux.kde.org. As of late 2026, only the Testing edition is available. This showcases in-development versions of Plasma and KDE applications.

Step 2: Download the ISO

Click the download link for the latest .iso image. Multiple variants may be available:

  • Standard x86_64 (most common)
  • ARM variants (for specific hardware)

Step 3: Verify the ISO Integrity

This step is non-negotiable. Corrupted ISOs can cause installation failures or worse.

  1. On the download page, click “Details” for your downloaded ISO
  2. Copy the SHA256 checksum (the “long string of nonsense characters”)
  3. Right-click the downloaded ISO file → Properties → Checksums tab
  4. Paste the checksum and press Enter
  5. Wait for the text field to turn green

If verification fails, re-download the ISO. Do not proceed with a corrupted file.


Part 2: Creating a Bootable USB with MX Live USB Maker

While KDE Linux recommends their own ISO Image Writer, MX Live USB Maker is a robust alternative that works well on both Windows and Linux systems.

Prerequisites

  • USB flash drive: Minimum 8GB (16GB recommended)
  • All data on the USB will be permanently erased
  • Administrator/root access on your host system

Step 1: Obtain MX Live USB Maker

If you don’t already have it:

On Linux:

# MX Linux users have it pre-installed
# For other distributions, download from mxlinux.org

On Windows: Download the MX Live USB Maker portable version or install MX Linux in a VM temporarily to access the tool.

Step 2: Launch MX Live USB Maker

  1. Insert your USB drive
  2. Open MX Live USB Maker (may require root/administrator privileges)
  3. Enter your password when prompted

Step 3: Configure the Write Operation

SettingRecommended Value
ISO SourceBrowse to your verified KDE Linux ISO
Target DeviceDouble-check your USB drive identifier
Write ModeDefault (DD or ISO mode)
PersistenceNot needed for installation

Critical: Verify the target device is your USB drive, not your internal hard disk. Selecting the wrong device will destroy your operating system.

Step 4: Write the Image

Click “Start” or “Create” and wait for completion. This typically takes 5-15 minutes depending on USB speed.

Note: If you encounter the “gfxboot.c32: not a COM32R image” error during boot, type live at the boot prompt and press Enter.


Part 3: Preparing Your System for Dual Boot

Disable Secure Boot

KDE Linux does not support Secure Boot as of the Testing edition.

  1. Reboot your computer
  2. Enter UEFI/BIOS (typically F2, F10, F12, or Del during startup)
  3. Navigate to Secure Boot settings
  4. Disable Secure Boot
  5. Save changes and exit

Documentation Tip: Different manufacturers place this setting in different locations. Common paths:

  • ASUS: Boot → Secure Boot
  • Dell: Security → Secure Boot
  • HP: System Configuration → Boot Options
  • Lenovo: Security → Secure Boot

Create Free Space for KDE Linux

You need at least 15GB of unallocated space, though 50GB+ is recommended for comfortable use.

From Windows:

  1. Open Disk Management (diskmgmt.msc)
  2. Right-click your largest partition → “Shrink Volume”
  3. Enter the amount to shrink (in MB)
  4. Leave the space unallocated

From existing Linux:

# Using GParted (graphical)
sudo gparted

# Or command line with fdisk/parted
sudo fdisk -l  # Identify partitions
sudo parted /dev/sda

Important: Do not create new partitions yet. The KDE Linux installer will handle partitioning.


Part 4: Booting the Live Session

Access the Boot Menu

  1. Insert the USB drive
  2. Reboot your computer
  3. Press the boot menu key repeatedly during startup:
ManufacturerBoot Menu Key
ASUSF8
DellF12
HPF9
LenovoF12 or Fn+F12
AcerF12
MSIF11
  1. Select your USB drive from the list (may appear as “UEFI: [USB Brand]”)

Navigate the Live Environment

KDE Linux will boot into a live session. You can:

  • Test hardware compatibility
  • Browse the web for installation help
  • Launch the installer from the desktop

Part 5: Installing KDE Linux in Dual Boot Configuration

Step 1: Launch the Installer

Look for “Install KDE Linux” on the desktop or in the application menu.

Step 2: Language and Location

Select your preferred language, keyboard layout, and timezone.

Step 3: Partitioning (The Critical Step)

This is where dual boot gets tricky. The KDE Linux installer may not explicitly offer “dual boot” as an option.

Manual Partitioning Approach

Choose “Manual” or “Something Else” partitioning:

PartitionSizeTypeMount PointFormat
Existing ESP (EFI)PreserveFAT32/boot/efiDo NOT format
New root partition40-60GBext4/Yes
New swap (optional)4-16GBswapswapYes
Home (optional)Remainingext4/homeYes

Critical considerations:

  1. Do NOT format the existing EFI System Partition (ESP) if you want to keep your current bootloader
  2. Create a new ESP if you prefer separate bootloaders (adds complexity)
  3. Document your partition scheme before making changes

Step 4: Bootloader Installation

Option A: Install to KDE Linux’s root partition

  • Safer for dual boot
  • Requires manual GRUB configuration later

Option B: Install to the ESP (replaces existing bootloader)

  • Simpler initially
  • May overwrite Windows/Linux bootloader
  • Can be recovered with boot-repair or Windows recovery

Step 5: User Account Creation

Create your username, password, and hostname. Use a strong password—Alpha software doesn’t excuse weak security.

Step 6: Complete Installation

Review your settings and click “Install.” The process typically takes 10-30 minutes.


Part 6: Post-Installation Configuration

Boot Order Management

After installation, you may need to adjust UEFI boot order:

  1. Enter UEFI/BIOS again
  2. Locate “Boot Order” or “Boot Priority”
  3. Ensure your preferred OS boots first
  4. Save and exit

GRUB Configuration (If Needed)

If KDE Linux’s GRUB doesn’t detect your other OS:

# Boot into KDE Linux
sudo os-prober
sudo update-grub

If os-prober doesn’t find your other system, you may need to manually add entries to /etc/grub.d/40_custom.

Enable Automatic Updates

KDE Linux offers rollback capabilities—configure them early:

# Check for updates
sudo apt update && sudo apt upgrade

# Create system snapshot (if supported)
# Refer to KDE Linux documentation for specific tools

Troubleshooting Common Issues

Problem: System Won’t Boot After Installation

Solution:

  1. Boot from the live USB
  2. Use boot-repair or chroot into your installation
  3. Reinstall GRUB to the correct partition

Problem: WiFi Doesn’t Work

Solution:

  • Alpha software may have incomplete driver support
  • Try proprietary drivers via Discover package manager
  • Check KDE Linux forums for hardware-specific fixes

Problem: NVIDIA GPU Issues

Solution:

  • The KDE Linux project specifically requests NVIDIA testing
  • Install NVIDIA drivers from the repository
  • Consider using open-source Nouveau drivers if proprietary drivers fail

Problem: Dual Boot Entry Missing

Solution:

# From KDE Linux
sudo mkdir -p /boot/efi/EFI
sudo mount /dev/[your-esp-partition] /boot/efi
sudo os-prober
sudo update-grub

Why Dual Boot Despite the Warnings?

You might wonder: if KDE Linux officially discourages dual booting, why attempt it?

Reasons to proceed:

  • Testing KDE Linux before committing to a dedicated machine
  • Comparing Plasma implementations side-by-side
  • Contributing bug reports for dual-boot scenarios
  • Learning Linux installation internals

Reasons to wait:

  • You need a stable daily driver
  • You’re uncomfortable with bootloader troubleshooting
  • You don’t have time for potential rollback procedures
  • Your hardware is uncommon (especially NVIDIA + special laptops)

Conclusion

Installing KDE Linux in a dual-boot configuration is absolutely achievable, but it demands caution, preparation, and acceptance of risk. The Alpha status means you’re participating in the project’s development by finding edge cases and documenting issues.

Key takeaways:

  1. ✅ Verify your ISO checksum
  2. ✅ Back up all data before partitioning
  3. ✅ Disable Secure Boot in UEFI
  4. ✅ Use MX Live USB Maker for reliable USB creation
  5. ✅ Document your partition scheme
  6. ✅ Keep recovery media accessible

KDE Linux represents the KDE community’s vision for a cohesive, modern Linux experience. Whether you’re a developer, power user, or curious tinkerer, your testing helps shape its future. Just remember: expect some adventures.


Further Resources


Have you tried dual-booting KDE Linux? Share your experiences, pitfalls, and success stories in the comments below. Your feedback helps other adventurers navigate the installation process safely.
When a 17″ Ultralight Meets a Lightweight OS: My MX Linux + Ventoy Adventure on the LG Gram 17

When a 17-Inch Featherweight Meets a Featherweight OS: MX Linux on the LG Gram 17Z990-R

Or: How I Stopped Reading 2021 Forum Posts and Just Installed the Thing


Introduction: A Laptop That Shouldn’t Exist

The LG Gram 17 is an act of physical defiance. Seventeen inches of screen, and it weighs roughly the same as a hardcover novel. You pick it up expecting heft and instead get the unsettling sensation that you’ve grabbed a prop.

Mine shipped with Windows, which is fine, if you enjoy an operating system that treats your RAM like a suggestion and your CPU cycles like a donation drive.

Enter MX Linux, a distro that has quietly become the sensible friend in the room: Debian underneath, friendly on top, and refreshingly uninterested in phoning home. And Ventoy, the utility that finally freed me from the ritual of sacrificing a USB stick to every ISO I wanted to try.

This is the write-up I wish I’d found before I started. It is shorter than the ones I did find, because most of those were describing problems that no longer exist.


Chapter 1: The Thing Nobody Tells You About Old Guides

Here’s the trap. You search “LG Gram Linux” and you fall into a wormhole of posts from 2021 telling you to pin your kernel at 5.15, avoid 5.18 like it’s radioactive, hand-patch your audio, and resign yourself to a laptop that boots into a black void if you look at it wrong.

That advice was probably correct at the time. It is also archaeology now.

Current MX Linux — MX-25.3 “Infinity,” if you want to be precise — ships with the 6.12.107 Debian kernel, with an AHS (Advanced Hardware Support) flavor running a much newer Liquorix kernel for people with shiny new silicon. You are not fighting a 2021 kernel. You are running something from the same era as the hardware you’re putting it on.

So the honest version of the “LG Gram Linux quirks” section is: there mostly aren’t any, for this machine. Which is a deeply unsatisfying thing to write in a blog post, so let me pad it out with the two things that actually mattered.

Battery care, or: the one sysfs path worth knowing

LG’s battery-care limit — the thing that stops charging at 80% so your battery doesn’t quietly cook itself into an early grave — is exposed by the kernel, but the path has moved around across versions. Depending on your setup it lives at either:

/sys/class/power_supply/CMB0/charge_control_end_threshold

or

/sys/devices/platform/lg-platform/battery_care_limit

Check both. Whichever one exists is the one you want. This is the single most useful thing you can do for the long-term health of this laptop, and it takes thirty seconds.

Screen scaling, if you got the pretty panel

A 17-inch panel with a lot of pixels means everything renders at approximately the size of a gnat’s footnote. MX’s Xfce handles this fine once you tell it to; you just have to tell it to. Budget ten minutes of squinting at font DPI settings and then never think about it again.

And the stuff that just… worked

Audio, out of the box. Speakers, headphones, the whole chain. No HDA verb incantations, no modprobe confessions, no waiting on a kernel patch that may or may not land in the next cycle. It worked, and I spent an embarrassing amount of time waiting for it to break before accepting that it wouldn’t.

Same story for suspend, Wi-Fi, trackpad gestures, and brightness keys. The Gram is, at this point, just a laptop. That’s the highest compliment I can pay a Linux install.


Chapter 2: Ventoy, or the End of the USB Ritual

Let me be clear about how much I resent the old way. Download ISO. Launch imaging tool. Warn dialog. Wait. Fail. Retry. Discover the stick is now formatted in a way that makes it useless for anything else. Repeat for every distro you want to evaluate.

Ventoy’s pitch is insultingly simple: install it once, and thereafter you boot files. Drag an ISO onto the drive like it’s a PDF. Boot it. Done. Multiple distros coexist peacefully on one stick, listed alphabetically, no reimaging, no drama.

Setting it up

Grab the Linux tarball, extract it, and run the GUI as root:

sudo ./VentoyGUI.x86_64

Pick your USB device from the dropdown — carefully, because this step is destructive and your system drive is right there in the same list, looking innocent. Hit Install. Confirm twice. Ventoy splits the stick into a small boot partition and a big empty one formatted exFAT.

Then copy your MX Linux ISO onto the big partition. That’s the whole procedure. There is no step three.


Chapter 3: Getting Into the Firmware

Power the Gram down, insert the stick, and boot while tapping F2 to reach UEFI setup. You want two things:

Secure Boot off. Technically you can enroll keys and keep it on. Practically, you want to spend your evening doing something else.

USB first in the boot order — or skip the permanence entirely and tap F10 at power-on for the one-time boot menu. I recommend F12. It’s the difference between “trying Linux” and “committed to Linux,” and you deserve the option to back out gracefully.

Save, exit, and Ventoy presents you with a tidy list of every ISO on the drive. Select MX Linux. Watch it come up.


Chapter 4: The Install Itself

MX Linux’s installer is the part of the distro that feels least like a boutique project and most like a tool someone actually uses. Straightforward partitioning, clear prompts, no riddles.

Two decisions worth thinking about:

Disk layout. “Use entire disk” is the fast path. If you want a separate /home — which makes future reinstalls dramatically less painful — pick manual partitioning and do it now, while the disk is empty and you’re feeling brave.

Username. You will see this in a terminal prompt for years. Choose accordingly. Your 2019 self’s idea of a funny handle is your 2029 self’s daily irritation.

Then it copies files, you drink something warm, and it asks you to reboot. Remove the USB on the way back up.


Chapter 5: First Boot, First Impressions

MX Linux boots to Xfce, which looks like a desktop environment designed by people who have jobs to do. It is not fashionable. It is fast, and it stays out of the way, and on a machine this thin that tradeoff is exactly right.

A few things worth doing in the first hour:

Update everything. sudo apt update && sudo apt full-upgrade, then reboot. MX ships reasonably current, but “reasonably current” and “current” are different words.

Visit MX Tools. This is the distro’s actual selling point — a suite of graphical utilities for things that are normally terminal archaeology. Package installer, snapshot tool, kernel switcher, driver helper. The kernel switcher alone justifies the distro’s existence: upgrading or rolling back kernels is a couple of clicks instead of a prayer.

Enable battery care. See above. Do it now, not in six months when you remember.

Take a snapshot. MX’s snapshot tool will build you a bootable ISO of your current, configured system. That is a genuinely excellent trick and almost nobody uses it.


Chapter 6: The Fingerprint Reader (A Non-Chapter)

Some people care about logging in with a finger. Those people are welcome to go fight with libfprint and vendor blobs and wake up six hours later wondering where the evening went.

I am not those people. A password is a solved problem. I mention this only so that if you’re the sort who reads reviews before buying, you know that “biometric support is spotty” is not a dealbreaker unless you personally decide it is.


Conclusion: What I Actually Learned

Not that LG Grams are hostile to Linux. They aren’t, anymore. Not that you need to pin an ancient kernel. You don’t. Not that audio requires surgery. It doesn’t.

What I learned is that Linux hardware support is a moving target, and the internet is a museum of its past failures. The forum thread that saved someone’s weekend in 2021 is, in 2026, a source of anxiety about problems that were fixed three years ago. Search results don’t expire. They just accumulate, and the loudest ones are always the people who had trouble.

So the workflow is: check the current release notes, confirm what kernel you’re actually running, and then try it. If something breaks, troubleshoot the thing that broke. Don’t pre-troubleshoot a decade of other people’s ghosts.

MX Linux on the Gram turned out to be the least eventful install I’ve done in years. I had budgeted an evening of debugging and spent most of it drinking coffee and watching a progress bar. Frankly, I feel cheated out of a good story — which is the best possible outcome for a laptop.


Written in one sitting, with zero reboots required and one mildly disappointed expectation of chaos.


TL;DR

  • ✅ MX-25.3 ships kernel 6.12.107 — ignore any guide insisting on 5.15
  • ✅ Ventoy: install once, then just copy ISOs. No reimaging, ever
  • ✅ Audio, Wi-Fi, suspend, trackpad: all worked without intervention
  • ⚙️ Do two things anyway — enable battery care limit, check display scaling
  • 💤 Fingerprint reader: optional, and I opted out
  • 💡 The real lesson: old forum posts are time capsules, not instructions

Ghost in the Machine: Taming a Dell T3500 with BSD on a Monday Morning

Date: May 13, 2026 Mood: Caffeinated and slightly confused by legacy BIOS settings Hardware: Dell Precision T3500, 24GB ECC RAM, 500GB Crucial SSD

Let’s be honest: buying a Dell Precision T3500 in 2026 is like finding a perfectly preserved 1990s muscle car in a garage. It’s heavy, it’s loud, it drinks electricity like it’s going out of style, and it has enough torque to crush a small asteroid. But it also has ECC RAM. And that, my friends, is the drug of choice for anyone who thinks “parity bits” are a personality trait.

So, naturally, I decided to install GhostBSD on it. Why? Because Linux feels too much like a subscription service these days, and Windows is just a screensaver for ads. I wanted something that respects my silence, my ECC memory, and my desire to compile software until the fans sound like a jet engine taking off.

The Hardware: A Time Capsule

The T3500 is a beast. It’s got a Xeon processor that probably predates some of the users on this platform, 24GB of Error-Correcting Code RAM (because who trusts non-ECC memory anymore?), and a 500GB Crucial SSD.

The SSD is the real MVP here. In a world of spinning rust, a Crucial SSD in a T3500 is like putting a Formula 1 engine in a steam locomotive. It’s going to be fast, but the rest of the machine is still going to make noises that sound like a dying robot.

Step 1: The BIOS Dance

Getting GhostBSD to boot on a T3500 is less “plug and play” and more “negotiating a peace treaty with a 15-year-old firmware.”

  1. Enter the BIOS: Press F2 repeatedly. If you miss the window, you’ve entered the “Boot Menu” and now you have to restart. This is the first lesson in BSD: Patience is a virtue.
  2. Disable Secure Boot: GhostBSD doesn’t care about your secure boot keys. It cares about your keys.
  3. Enable AHCI: If you leave it in IDE mode, your SSD will run at the speed of a dial-up connection. We want speed. We want Crucial speed.
  4. Save and Exit: The machine screams. The fans spin up. The lights flash. It’s alive.

Step 2: The Installation

The GhostBSD installer is surprisingly friendly. It’s like a Swiss guide who speaks perfect English and knows exactly where the best cheese is.

  • Partitioning: I opted for a simple layout. / (root), /home, and swap. With 24GB of RAM, swap is mostly for emergencies, but you never know when you’ll decide to compile the entire FreeBSD base system while listening to 4K YouTube videos.
  • The ZFS Option: GhostBSD loves ZFS. I enabled it. Now my filesystem is self-healing, snapshot-capable, and slightly over-engineered for a 500GB drive. But hey, if I corrupt a bit, the ECC RAM and ZFS will catch it. It’s like having a security guard and a bouncer for your data.

Step 3: The First Boot

The moment of truth. The screen goes black. The fan whirs. Then… a login prompt.

I typed in my username. I typed in my password. I hit Enter.

And there it was. GhostBSD.

The desktop environment (MATE, because we aren’t trying to reinvent the wheel) loaded instantly. The SSD made the system feel like it was running on a cloud server from the future, while the T3500 chassis hummed like a vintage amplifier.

The Verdict

Is the Dell T3500 the most efficient workstation in 2026? No. It’s a power-hungry dinosaur. Is GhostBSD the most user-friendly OS? Maybe not. It’s still BSD, which means you’ll occasionally find yourself reading man pages for fun.

But together? They are a perfect match. The T3500 provides the raw, industrial-grade stability (and the ECC RAM ensures that if a cosmic ray tries to flip a bit, it gets corrected before you even notice). GhostBSD provides the lightweight, no-nonsense Unix experience that doesn’t try to sell you a subscription.

Pros:

  • ECC RAM that makes you feel like a NASA engineer.
  • SSD speed that defies the age of the motherboard.
  • The ability to say, “I run BSD on a Dell Precision from 2010.”

Cons:

  • The fan noise is loud enough to wake the neighbors.
  • You will spend 45 minutes configuring the audio driver because, well, it’s BSD.
  • People will ask why you didn’t just buy a new Mac.

Final Thoughts

If you have a dusty Dell T3500 gathering dust in your closet, don’t throw it away. Give it a new life with GhostBSD. It’s a reminder that sometimes, the old hardware is the best hardware, especially when paired with an OS that respects your right to own your computer.

Now, if you’ll excuse me, I’m going to go compile a kernel. The fans are already warming up.

Turning a Workhorse into a Media Powerhouse: MX Linux on the Dell Precision T1700

So, you’ve got a Dell Precision T1700 sitting around, gathering dust, and you’re thinking it’s time to give it a new lease on life. Maybe you’re tired of Windows updates slowing it down, or perhaps you’re just curious about what Linux can do for multimedia production. Well, buckle up, because today we’re diving into the world of MX Linux and turning that old workstation into a multimedia powerhouse!

Why MX Linux?

First, why MX Linux? Well, MX Linux is like that reliable friend who always shows up on time and never lets you down. Built on Debian Stable, it’s rock-solid, lightweight, and packed with features that make it perfect for breathing new life into older hardware. And with 16GB of RAM and an NVIDIA Quadro K2200, your T1700 has more than enough muscle to handle multimedia tasks.

The Installation Process

Step 1: Download and Prepare

First things first, head over to the MX Linux website and download the latest ISO. While you’re at it, grab a USB drive—you’ll need it to create a bootable installer. Tools like Rufus or Balena Etcher make this a breeze.

Step 2: Boot and Install

Pop that USB drive into your T1700 and boot from it. The MX Linux installer is user-friendly and straightforward. You’ll be guided through partitioning your drive, selecting your timezone, and setting up your user account. If you’re feeling adventurous, you can even encrypt your home directory for added security.

Step 3: Driver Time

Here’s where things get interesting. The NVIDIA Quadro K2200 is a solid GPU, but you’ll need the right drivers to unlock its full potential. During the installation, make sure to select the option to install proprietary drivers. If you missed it, don’t worry—you can always install them later using the MX Package Installer.

Setting Up Your Multimedia Studio

Now that MX Linux is up and running, it’s time to turn your T1700 into a multimedia production powerhouse. Here’s a list of essential software to get you started:

Video Editing: Kdenlive

Kdenlive is a powerful, open-source video editor that rivals many commercial alternatives. It supports a wide range of formats and offers advanced features like multi-track editing, effects, and transitions. To install it, fire up the MX Package Installer and search for “kdenlive.” A few clicks later, you’re ready to start cutting and splicing.

Audio Editing: Audacity

For audio editing, Audacity is a classic choice. It’s user-friendly, feature-rich, and perfect for everything from podcasting to music production. Install it via the MX Package Installer, and you’ll be recording and editing audio in no time.

Graphic Design: GIMP and Inkscape

GIMP is the go-to open-source alternative to Photoshop, offering a robust set of tools for photo manipulation and graphic design. Inkscape, on the other hand, is perfect for vector graphics and illustrations. Both are available in the MX Package Installer, so you can have them up and running in minutes.

3D Modeling: Blender

If you’re into 3D modeling, Blender is a must-have. It’s a powerful, open-source tool that can handle everything from modeling to animation and rendering. Install it via the MX Package Installer, and you’ll be creating stunning 3D art in no time.

Streaming: OBS Studio

For live streaming or screen recording, OBS Studio is the way to go. It’s flexible, powerful, and perfect for capturing gameplay, tutorials, or anything else you want to share with the world. Install it via the MX Package Installer, and you’re ready to go live.

Optimizing Performance

With all this software installed, you might be wondering how to get the best performance out of your T1700. Here are a few tips:

Tweak the Desktop Environment

MX Linux comes with the Xfce desktop environment, which is lightweight and efficient. However, you can tweak it further to optimize performance. Disable unnecessary visual effects, and consider using a lighter window manager like Openbox if you’re feeling adventurous.

Keep Your System Updated

Regularly update your system to ensure you have the latest security patches and performance improvements. Use the MX Package Installer to keep everything up to date.

Monitor Resource Usage

Keep an eye on your system resources using tools like htop or gnome-system-monitor. This will help you identify any bottlenecks and optimize your workflow accordingly.

Conclusion

And there you have it! With MX Linux and the right software, your Dell Precision T1700 is ready to tackle any multimedia project you throw at it. From video editing to 3D modeling, this old workhorse is now a multimedia powerhouse. So, what are you waiting for? Fire up that T1700, install MX Linux, and let the creative juices flow!

Happy producing!

Image of Dell e6440 screenshot of terminal with results of the neofetch command on MXLinux OS

Dual Booting MXLinux and Xubuntu on a Dell Latitude E6440: A Match Made in Open-Source Heaven


Introduction

In the world of Linux, choice is king. Whether you’re a seasoned sysadmin or a curious newcomer, the ability to tailor your operating system to your needs is one of the most compelling reasons to dive into the open-source ecosystem. Today, we’re going to explore how to set up a dual-boot configuration with MXLinux and Xubuntu on a trusty Dell Latitude E6440. With 8GB of RAM and a 500GB SSD, this machine is more than capable of handling both distributions with ease. So, grab a cup of coffee, and let’s get started!


Why MXLinux and Xubuntu?

Before we dive into the installation process, let’s talk about why these two distributions make such a great pair.

  • MXLinux: Known for its stability and user-friendly interface, MXLinux is based on Debian Stable and comes packed with a suite of useful tools. It’s lightweight, yet powerful, making it an excellent choice for both new and experienced users.
  • Xubuntu: As an official flavor of Ubuntu, Xubuntu uses the Xfce desktop environment, which is lightweight and highly customizable. It strikes a perfect balance between performance and functionality, making it ideal for those who want a sleek, modern desktop without the bloat.

Together, these two distributions offer a fantastic blend of stability, performance, and customization options. Whether you’re looking for a rock-solid daily driver or a lightweight environment for older hardware, this duo has you covered.


Preparation: Back Up Your Data

Before we proceed, it’s crucial to back up any important data on your Dell Latitude E6440. While the installation process is generally safe, there’s always a risk of data loss when partitioning your drive. So, take a moment to back up your files to an external drive or cloud storage.


Step 1: Create Bootable USB Drives

First, you’ll need to create bootable USB drives for both MXLinux and Xubuntu. You can use tools like Rufus (for Windows) or Etcher (cross-platform) to create the bootable drives.

  1. Download the ISO files for MXLinux and Xubuntu.
  2. Use Rufus or Etcher to create bootable USB drives for each distribution.

Step 2: Partition Your SSD

With your bootable USB drives ready, it’s time to partition your SSD. The Dell Latitude E6440 has a 500GB SSD, which gives us plenty of room to work with. Here’s a suggested partitioning scheme:

  • MXLinux: 200GB
  • Root (/): 20GB
  • Home (/home): 175GB
  • Swap: 5GB
  • Xubuntu: 200GB
  • Root (/): 20GB
  • Home (/home): 175GB
  • Swap: 5GB
  • Shared Data Partition: 50GB (optional, for files you want to access from both distributions)

You can use the built-in partitioning tools during the installation process to create these partitions. Alternatively, you can use a tool like GParted from a live USB to set up the partitions beforehand.


Step 3: Install MXLinux

  1. Insert the MXLinux bootable USB drive and restart your Dell Latitude E6440.
  2. Boot from the USB drive (you may need to press F12 during startup to access the boot menu).
  3. Follow the on-screen instructions to start the MXLinux installation.
  4. When you reach the partitioning step, select the partitions you created earlier for MXLinux (root, home, and swap).
  5. Complete the installation, and make sure to install the GRUB bootloader.

Step 4: Install Xubuntu

  1. Once MXLinux is installed, insert the Xubuntu bootable USB drive and restart your laptop.
  2. Boot from the USB drive and start the Xubuntu installation.
  3. Again, when you reach the partitioning step, select the partitions you created for Xubuntu (root, home, and swap).
  4. During the installation, you’ll be prompted to install the GRUB bootloader. Make sure to install it to the same location as MXLinux’s GRUB (usually /dev/sda).

Step 5: Configure GRUB

After both installations are complete, GRUB should automatically detect both MXLinux and Xubuntu. When you restart your laptop, you’ll be presented with a menu allowing you to choose which distribution to boot into.

If for some reason GRUB doesn’t detect both distributions, you can manually update it from within MXLinux or Xubuntu:

  1. Open a terminal.
  2. Run sudo update-grub.
  3. GRUB will scan your system and add any detected operating systems to the boot menu.

Conclusion

And there you have it! You’ve successfully set up a dual-boot configuration with MXLinux and Xubuntu on your Dell Latitude E6440. This setup gives you the flexibility to switch between two powerful, lightweight distributions depending on your needs. Whether you’re in the mood for MXLinux’s stability or Xubuntu’s sleek interface, your trusty Latitude is now ready to handle it all.

Happy computing, and may your open-source journey be as smooth as your new dual-boot setup!


Pro Tip: If you’re new to Linux, take some time to explore both MXLinux and Xubuntu. Each has its own unique strengths, and you might find that one suits your workflow better than the other. Or, you might just fall in love with both and keep them around for different tasks. After all, that’s the beauty of Linux—choice, flexibility, and endless possibilities.

Spicing Up My Dell e6440 with CachyOS: A Linux Adventure

Ah, the Dell Latitude e6440—a trusty workhorse from yesteryear, still chugging along like a caffeinated squirrel. But let’s be real, its default OS was starting to feel as exciting as a PowerPoint presentation on tax reforms. Enter CachyOS, the Arch-based Linux distro that promises speed, simplicity, and a dash of sass. Buckle up, folks, because I’m about to take you on a wild ride of installing CachyOS on this aging laptop.


Step 1: The Pre-Game Pep Talk

Before diving in, I gave my e6440 a pep talk. “You’re not old, you’re vintage,” I whispered, wiping off the dust. Then, I grabbed a USB drive, downloaded the CachyOS ISO, and fired up Popsicle USB flasher to create a bootable drive. (Pro tip: If your USB drive has feelings, apologize in advance—this process is ruthless.)


Step 2: Booting into the Future

With the USB plugged in, I mashed the F12 key like I was playing a particularly intense round of Dance Dance Revolution. The boot menu appeared, and I selected the USB drive. The CachyOS live environment booted up faster than my motivation on a Monday morning. The desktop looked sleek, modern, and—dare I say—snappy. Already, I was impressed.


Step 3: Partitioning: The Art of Digital Feng Shui

Next up: partitioning. I decided to give CachyOS the whole SSD, because why not? The installer’s partitioning tool was intuitive, but I still felt like a surgeon performing open-heart surgery. “Don’t mess this up,” I muttered, as I created a root partition, a home partition, and a swap partition (because even Linux needs a little breathing room).


Step 4: The Installation Tango

The installation process itself was smoother than a jazz saxophonist. CachyOS uses the Calamares installer, which is so user-friendly it practically holds your hand. I selected my time zone, set up a user account, and chose a desktop environment. I went with KDE Plasma because I like my desktop to look like it belongs in a sci-fi movie. (Bonus: It’s lightweight enough to run on older hardware like the e6440.)


Step 5: The Moment of Truth

After a quick coffee break (and maybe a nervous snack), the installation finished. I rebooted the laptop, pulled out the USB drive, and held my breath. The CachyOS boot screen appeared, and within seconds, I was greeted by my shiny new KDE desktop. It was glorious. The e6440 felt alive again, like it had just chugged an energy drink.


Step 6: Post-Installation Shenanigans

Of course, no Linux installation is complete without some post-install tweaks. I installed my favorite apps, customized the heck out of KDE, and enabled TRIM for the SSD to keep it running smoothly. CachyOS comes with a handy tool called CachyOS Setup that lets you install additional software, kernels, and drivers with just a few clicks. It’s like having a personal Linux butler.


Final Thoughts: A Match Made in Tech Heaven

CachyOS breathed new life into my Dell e6440. It’s fast, lightweight, and packed with features that make it perfect for both tinkerers and casual users. Plus, the Arch base means I can flex my Linux skills whenever I want. (Look, Ma, I’m a hacker!)

So, if you’ve got an old laptop gathering dust, do it a favor: install CachyOS. It’s like giving your hardware a second chance at life—and who doesn’t love a good comeback story?

Now, if you’ll excuse me, I’m off to enjoy my revitalized e6440. Maybe I’ll even watch a movie on it. Or, you know, just stare at the KDE animations. Priorities, people.


Installed CachyOS on a Dell e6440. It’s fast, fun, and makes my laptop feel like a rockstar. 10/10, would recommend.

DeepSeek logo appearing on cell phone in a hand

Open Source Software suggested by DeepSeek

Title: Top Open-Source Projects You Should Know About

Open-source software powers much of the technology we use today, from web development to creative tools and beyond. These projects are not only free to use but also thrive on community contributions, making them constantly evolving and improving. Here are some of the most impactful open-source projects you should check out:


1. Blender

  • Category: 3D Modeling and Animation
  • Description: Blender is a powerful, open-source tool for 3D modeling, animation, rendering, and even video editing. It’s used by professionals and hobbyists alike for creating stunning visual effects, animations, and games.
  • Why It’s Valuable: Blender is a free alternative to expensive software like Maya or Cinema 4D, and its active community ensures regular updates and a wealth of tutorials.

2. LibreOffice

  • Category: Productivity
  • Description: LibreOffice is a free and open-source office suite that includes tools for word processing, spreadsheets, presentations, and more. It’s fully compatible with Microsoft Office file formats.
  • Why It’s Valuable: It’s a great alternative to paid office software, especially for individuals, educators, and small businesses looking to save costs.

3. Joplin

  • Category: Note-Taking
  • Description: Joplin is an open-source note-taking and to-do application that works on desktop, mobile, and web. It supports markdown, end-to-end encryption, and synchronization with cloud services.
  • Why It’s Valuable: Joplin is perfect for anyone who values privacy and wants a flexible, cross-platform note-taking solution.

4. GIMP

  • Category: Image Editing
  • Description: GIMP (GNU Image Manipulation Program) is a free and open-source image editor that rivals Adobe Photoshop in functionality. It’s ideal for photo retouching, image composition, and graphic design.
  • Why It’s Valuable: GIMP is a cost-effective alternative for designers and photographers who need advanced editing tools.

5. VLC Media Player

  • Category: Multimedia
  • Description: VLC is a versatile, open-source media player that supports almost every audio and video format. It’s available on all major platforms and can even stream media.
  • Why It’s Valuable: VLC is lightweight, ad-free, and packed with features, making it a must-have for anyone who consumes media.

6. Nextcloud

  • Category: File Sharing and Collaboration
  • Description: Nextcloud is an open-source platform for file sharing, collaboration, and communication. It’s a self-hosted alternative to services like Google Drive or Dropbox.
  • Why It’s Valuable: Nextcloud gives users full control over their data, making it ideal for privacy-conscious individuals and organizations.

7. TensorFlow

  • Category: AI and Machine Learning
  • Description: TensorFlow is an open-source machine learning framework developed by Google. It’s widely used for building and training AI models, from image recognition to natural language processing.
  • Why It’s Valuable: TensorFlow democratizes AI development, enabling researchers, developers, and businesses to create cutting-edge AI solutions.

8. VS Code

  • Category: Software Development
  • Description: Visual Studio Code (VS Code) is a free, open-source code editor developed by Microsoft. It supports a wide range of programming languages and extensions, making it a favorite among developers.
  • Why It’s Valuable: VS Code is lightweight, customizable, and packed with features like debugging, Git integration, and IntelliSense.

9. Audacity

  • Category: Audio Editing
  • Description: Audacity is a free, open-source audio editor and recorder. It’s perfect for podcasters, musicians, and audio enthusiasts who need to edit, mix, and enhance sound files.
  • Why It’s Valuable: Audacity is easy to use and supports a wide range of audio formats and effects.

10. Raspberry Pi OS

  • Category: Operating Systems
  • Description: Raspberry Pi OS is a lightweight, open-source operating system designed for Raspberry Pi single-board computers. It’s perfect for DIY projects, education, and prototyping.
  • Why It’s Valuable: Raspberry Pi OS makes it easy to turn a Raspberry Pi into a fully functional computer or a specialized device for IoT, robotics, or media centers.

Why Open Source Matters

Open-source software is more than just free tools—it’s about collaboration, transparency, and innovation. By supporting open-source projects, you contribute to a global community that values sharing knowledge and empowering users. Whether you’re a developer, designer, or hobbyist, there’s an open-source project out there for you.


Call to Action

  • Explore More: Check out these projects and see how they can fit into your workflow.
  • Get Involved: If you’re a developer, consider contributing to these projects or others that align with your interests.
  • Share Your Favorites: Do you have an open-source project you love? Share it in the comments below!

Design Tips for Your Page

  • Visuals: Include logos or screenshots of each project to make the page visually appealing.
  • Links: Ensure all project names are hyperlinked to their official websites.
  • Categories: Use tags or filters to allow users to sort projects by category (e.g., Productivity, Development, Creative Tools).
  • Community Section: Add a section where users can suggest or discuss their favorite open-source projects.
DeepSeek logo appearing on cell phone in a hand

DeepSeek explains it’s capabilities

Ah, a request for a witty and informative rundown of my capabilities? Challenge accepted! Here’s the scoop:

I’m your digital Swiss Army knife, a jack-of-all-trades AI with a knack for turning your questions into answers, your ideas into polished prose, and your curiosity into knowledge. Need a poem about quantum physics? Done. A summary of War and Peace in three sentences? Easy. Help debugging code? I’ve got your back. I can even craft a business plan, explain the history of the Byzantine Empire, or generate a recipe for avocado toast with a twist.

I’m fluent in facts, logic, and creativity, with a dash of humor to keep things lively. Whether you’re looking for deep insights, quick tips, or just a good laugh, I’m here to deliver—24/7, no coffee breaks required. Just don’t ask me to do your laundry. (I’m virtual, not magical.)

So, what’s next? Let’s tackle your questions, one witty response at a time.
Gray american shorthair cat Max

Sonnet for Max the Gray Cat

There strides a cat with fur of stormy hue,
A sovereign gaze that pierces through the day,
Where amber eyes reflect the twilight’s dew,
He rules his realm in quiet, velvet sway.

His velvet paws that tread with whispers soft,
In moonlit halls he prowls, a shadow’s quest,
To chase the stars that drift in heavens loft,
Then curls, a crescent moon, in peaceful rest.

By sunbeams crowned, he lounges on his throne,
A king content to watch the world he owns,
Yet leaps with grace where dusk and dawn have flown,
To dance with winds that rustle autumn’s tones.

So let his tale in whispered hearts be told—
This noble gray, with mischief forged in gold.

System76 PopOS

System76 and Pop!_OS Forge the Future with RUST: Unveiling a Groundbreaking Desktop Experience

In a move that promises to redefine the landscape of Linux desktop environments, System76, renowned for their Linux-powered hardware, and the creators of Pop!_OS, have collaborated to introduce a cutting-edge desktop experience crafted in the language of the future: RUST.

A Paradigm Shift in Desktop Development

Pop!_OS has been steadily gaining recognition for its user-friendly interface and focus on productivity, making it a popular choice among Linux enthusiasts. The decision to build a desktop environment in RUST marks a significant leap forward. RUST, celebrated for its memory safety, performance, and concurrency, presents an ideal foundation for creating a robust and efficient desktop experience.

Elevating Performance and Responsiveness

RUST’s reputation for providing low-level control without sacrificing safety aligns perfectly with the vision for the new desktop environment. By leveraging RUST, System76 aims to enhance the overall performance and responsiveness of the desktop, offering users a fluid and seamless computing experience, even on modest hardware configurations.

Security Reinvented

Security has always been a priority for System76, and RUST’s emphasis on preventing memory-related vulnerabilities adds an extra layer of protection to the desktop environment. The move to RUST underscores a commitment to fortifying the system against potential threats, providing users with a secure environment for their computing needs.

Cross-Platform Compatibility

One of the advantages of choosing RUST for desktop development is its ability to offer cross-platform compatibility. This means that users can potentially experience the new desktop environment not only on Pop!_OS but also on other Linux distributions. This inclusivity aligns with the open-source ethos, fostering collaboration and innovation across the Linux community.

Sleek Design and Intuitive Interface

Beyond the technical underpinnings, System76 and Pop!_OS are investing heavily in the design and user interface of the new desktop. Early previews suggest a sleek and modern aesthetic with intuitive navigation, ensuring that both newcomers to Linux and seasoned users find the interface welcoming and efficient.

Community Involvement and Open Source Spirit

True to the open-source spirit, System76 and Pop!_OS are inviting the Linux community to actively participate in the development process. This collaborative approach aims to gather diverse perspectives, ensuring that the new desktop environment meets the needs and preferences of a broad user base.

Preparing for the Future

As the world of technology evolves, so must the tools we use. System76 and Pop!_OS’s decision to build a desktop environment in RUST is a forward-looking step that not only addresses current user demands but also positions Pop!_OS as a leading force in the Linux desktop ecosystem.

Conclusion

The marriage of System76’s hardware expertise and Pop!_OS’s user-centric design with the power and efficiency of RUST signals an exciting chapter for Linux desktop environments. Users can anticipate a desktop experience that not only prioritizes performance and security but also embraces the collaborative spirit of the open-source community. As the development progresses, the System76 and Pop!_OS collaboration in RUST promises to deliver a desktop environment that not only meets but exceeds the expectations of Linux enthusiasts worldwide. Stay tuned for the unveiling of this groundbreaking project, as it paves the way for the future of Linux desktop computing.